Tuesday, June 23, 2015

Art By My Grandson

It all started with this picture sent to my family as a joke about how we are decorating our apartment.


My sister Debbie sent me this picture of her one year old granddaughter`s artwork. Light bulb moment!


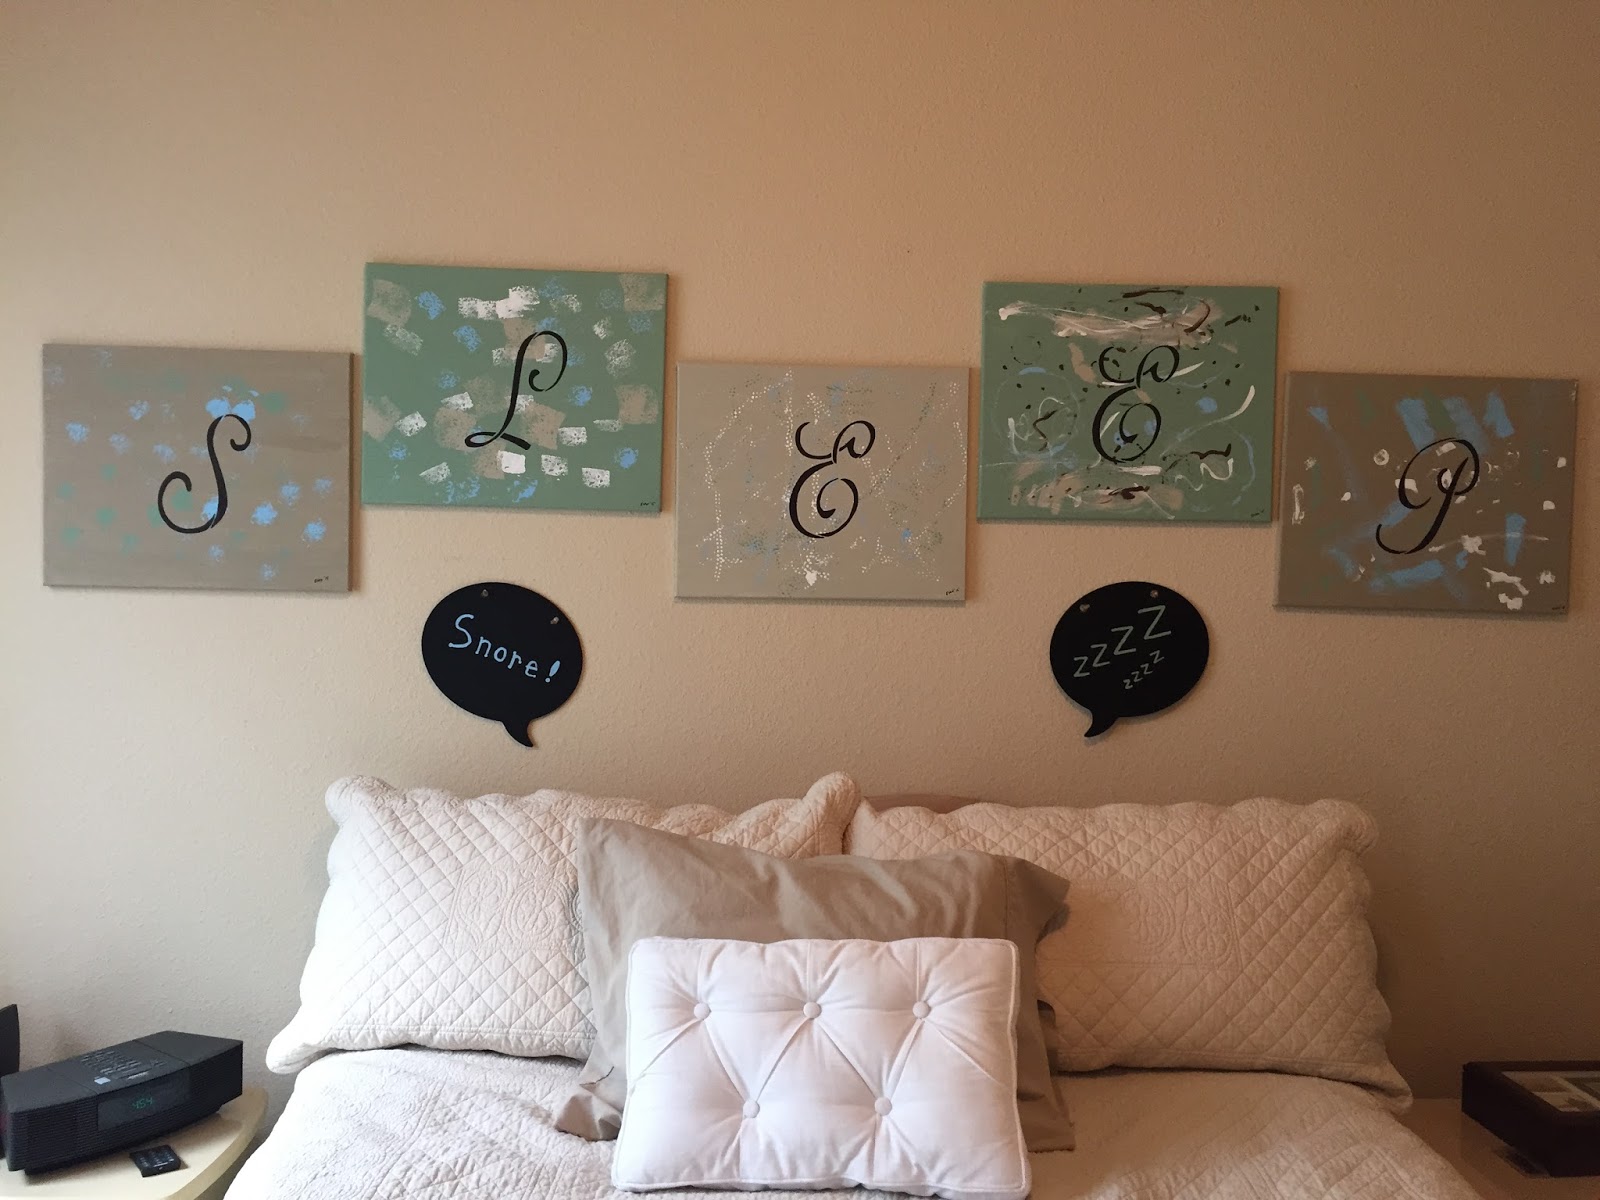
I am still looking for the cheapest way to decorate this apartment that I hope to only be in for a few months. Wishful thinking? So I decided to put my 27 month old grandson to work. I bought a package of 5 canvases for $19 that I got for $10 with a coupon, and 6 jars of craft paint for 69 cents each. I bought some cheap paint brushes and a package of letter stencils both totaling about $12. Then I bought two black chalk board talking bubbles for $3 each. Now it was time to put the boy to work.

While his parents are with his sister in the NICU, I picked him up from daycare and took him back to my apartment. I pre-painted the background of 5 canvases and they were all ready for him to paint. The first one he painted using the bottom of a water bottle, the large lid of a fruit container from the produce department, and several sizes of paint brushes. I stripped him down to his diaper and put him on the tiled kitchen floor at his kid table. He had a riot.


The rest of the canvases he painted on a Saturday evening while his Dad and Papa were at an Indy car race, and my daughter and grandson came over for dinner. He was stripped to his diaper and the painting began. The second canvas was painted with crumpled up tissue paper.


 The third canvas was painted with a cut up dish sponge.


The fourth canvas was painted with the lid of a paint bottle and a big paint brush.


 The last canvas was my favorite, and painted with a foot massage ball. I rolled it in the paint and then we rolled it back and forth to each other over the canvas.


When he was done with his art work, I laid them all out to dry and then stenciled them with the letter stencils, and a very large black sharpie. I then painted the word snore on one talking bubble and ZZZs on the other bubble.


All were hung the next day and I am so happy with my bedroom artwork, and so is my grandson. He loves to look at them every time he is over.


Tuesday, June 9, 2015

Flashback to the 80s

Sorry I have not had a post for a month. The last month has been very eventful. I was gone for a few weeks to visit family and my stuff in VA. While I was in VA our daughter went into labor 10 weeks early and had our granddaughter. Needless to say I have been a bit distracted.

Last week end was our official "little" move to Texas. We had to give up the rental furniture from the management company handling our temp housing, and move our stuff into our apartment. We went through the numbers and found it would be a lot cheaper to just fill the apartment with furniture from our daughter, and a few things we bought in Texas, instead of moving some furniture from VA. We have been moving kitchen items and linens from VA on each trip back and forth, So, this is the furniture we are using. The couch and chair we gave our daughter when she moved to Texas over 8 years ago is now in our apartment. FLASH BACK!! Her coffee and end table that are newer. She had a small unfinished table and some black Ikea chairs we are using for the dinning area. We are using her queen bed from her guest room, which is going to be the baby`s room now, so they needed to get rid of the bed anyway. One of the few furniture purchases we made was an old, old, old dresser and  two nightstands from one of our daughter`s friends.

The dinning table was just the right size, but I did not like the bare wood table legs under the table cloth and the way they looked next to the black chairs. This is not my table, so as much as I wanted to, I could not paint it. I could not change it permanently, so I came up with a temp fix. Black wrapping paper and wicker Duck tape. I wrapped each table leg several times with the paper, using scotch tape to hold the first edge in place. I used double sided scrap booking tape to hold the top seam in place on the back of the leg. Then I took the Duck tape and put a strip around the top of the leg and not quite at the bottom of the leg. Looks nice and you would never know it was paper. Brilliant!!


The dresser and night stands were a hard purchase for me because they are hideous. They are very low, modern retro with a shiny brass trim. Very 70s or 80s. I had a lot of ideas on how to make these livable, but just did not want to spend the time or the money to update something I hope to only have for a few months. So, I went for the Duck tape and  some decals.


I used the same wicker Duck tape and covered all the brass trim. It was such an easy job and made a big difference on how the furniture looked. No longer Brassy!!!!


I purchased the wall decals at Joann Fabrics and used the 50% off coupon to get it for about $7. I put the decals on the front of the drawers and cut the decal at the opening of each drawer. They look fine, and at least I do not want to gag every time I look at them. That`s a good thing, right?


I would have loved it if all the decals were the ivy that is on the bottom photo. It would have been cool to have the ivy go up and down along the front of the dresser. Oh well, in a perfect world I wouldn`t even need the furniture. Heaven knows this world is not perfect.

Grandma's Quilt

  My Paternal Grandma was a quilter. I mean a hardcore, full size, wood frame, hand sewn quilter. I remember as a kid in the 60s and 70s goi...