 |
| My little black widow is ready for Halloween! |
My Grandson wanted to be a spider for Halloween this year. After looking at some ready made costumes, and a few videos online, I had a general plan as to how I wanted to make the costume. Off to Walmart I went to buy all the supplies. This was for my 3 year old Grandson so I went straight to the toddler clothes section first. I found a pair of 5T black sweat pants, and a 5T long sleeved t-shirt. I found a package of Hanes women's knee high socks that were a soft knit that came in a 2 pk that were perfect for my spider legs. Next in the Men's department I found a fleece ski mask for the spider head. In the Craft Department I found large white buttons and some black plastic gem centers for the eyes. Next, it was off to the fishing section for fishing line, 6lb weight. I had 4 black buttons at home for the sleeves, poly fiber filling, a pair of black gloves, and some red felt for the hour glass. I am now ready to get started.
 |
| All the items I was able to purchase at Walmart! |
 |
I snipped the pink threads and pulled them
out of the sock.
|
First I took the socks and removed the pink Hanes writing on the toe. I just turned them inside out, cut the end of the pink stitching and pulled the strands out.
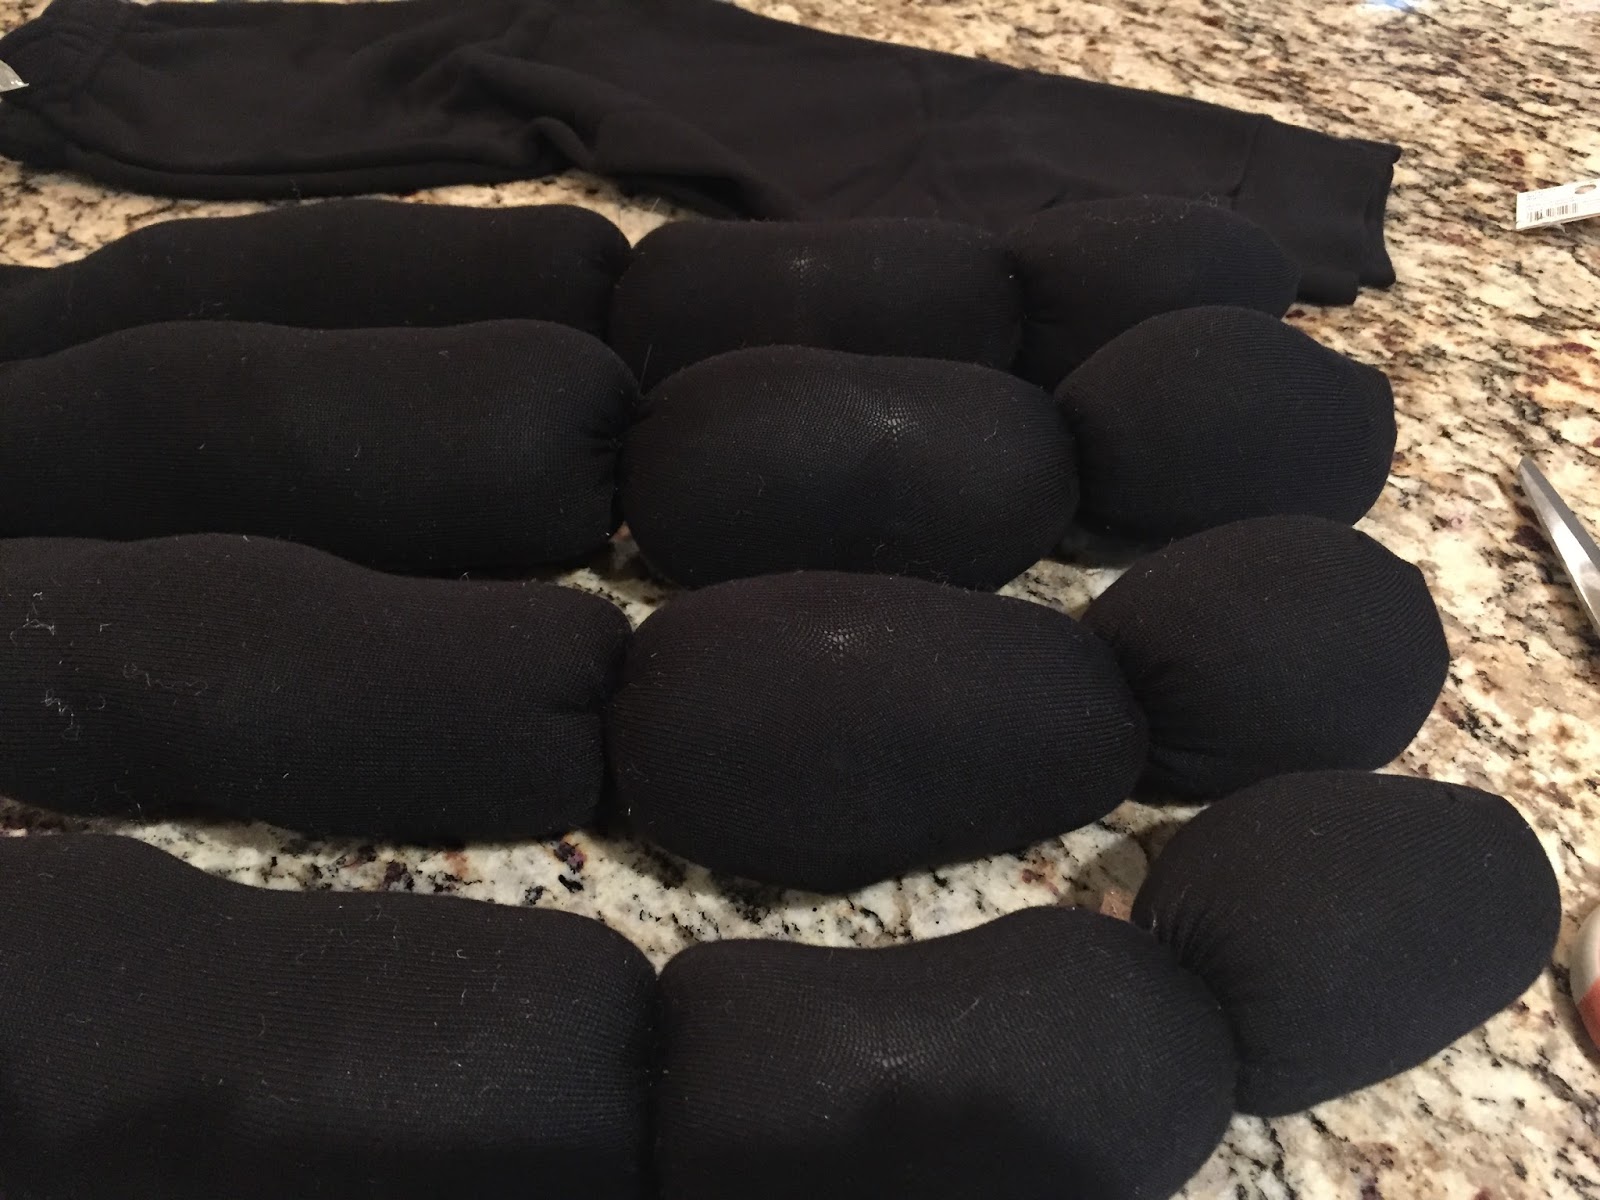
I stuffed the socks with poly fiber fill, so they were about 5 or 6 inches longer than the sleeve of the T-shirt. After stuffing the 4 legs, I took a strand of fishing line and tied the legs into 3 sections. I took the end of the line, wrapped it around the leg, tied it in a knot, wrapped it again and tied it in several knots. I did that for all 4 legs.
 |
| Stuffed stockings. |
 |
| I sectioned off the stuffed stockings using fishing line. |
Next I cut open the side seams of the T-shirt in two section on each side. I laid the t-shirt out on the table, laid the legs next to the shirt to see where I wanted them attached, and then marked the shirt as to where I would open the seams. I tried to make the arms of the shirt and the 2 spider sock legs evenly spaced on the side of the shirt. After marking the shirt, I opened the seam wide enough to fit the sock legs through. I pinned the legs in place and then sewed the seam closed with the the legs in place using my sewing machine.
 |
| I opened up the side seams of the shirt in two evenly spaced section on both sides. |
 |
| Using the sewing machine I sewed the legs into the side of the shirt. |
 |
| All legs are sewn into place. |
Now that the sock legs were sewn in place I wanted to connect the legs together with the fishing line. I took a long piece of line and threaded it into a large eyed needle. I knotted one end of the line and pushed the needle up through one of the tied sections of the bottom leg. When it was through the tied section I put a knot in the line to hold it in place. Then I pushed the needle into the knotted section of the middle leg leaving enough line between the two so that the leg would hang evenly. Once the needle was through the middle leg, and the distance was correct, I took the needle around to the bottom of the middle tied section again and brought it back up through the section again to make it stay in place. Then I tied a knot to hold it in place.
 |
| A needle is threaded with the fishing line with a large knot in the end. The needle is pushed through the tied section of the bottom leg. |
 |
| I am pulling the thread out of the top of the leg section. Then I tied a knot and pushed it through the same section in the middle leg. Then I took the needle around the tied section and put the needle back up through the middle leg section again to keep it in place and tied a knot. I pulled the line out of the needle and left the extra line attached to the middle leg. |
With the remaining line I measured the distance from the middle leg to the underside of the t-shirt arm. Making sure this was the same distance from the middle leg, as the distance was between the middle and bottom leg. Then I tied a small loop at the end of line for each section at the measured length.
I sewed a black button on the bottom seam of the t-shirt arm in the middle of the arm and at the wrist, on both sides. Then I connected the loops of the fishing line from the middle legs to the buttons of the shirt. I now have movable spider legs.
 |
| I sewed buttons onto the under side of the arms of the t-shirt. |
 |
| I measured the length and tied a loop in the remaining line attached to the sections of the middle legs and hooked them on the buttons of the t-shirt. |
For the spider head and eyes, I sewed the white buttons onto the ski mask in a random pattern. Then I sewed the black gems onto the center of the buttons.
 |
| The centers had holes in them on the sides so I could sew them on like a button on a button. |
For the last step, I used a large coffee cup to make my hour glass. I folded the felt in two, put the cup at the folded end, used a pen to mark the circle with a small stem at the fold for the middle of the hour glass, and then I cut it out. Before I opened it, I cut a sliver off the top of the circle to flatten it out a bit. Next, I pinned it to the front of the shirt and sewed it on by hand.
 |
| Once the hour glass was in place I pinned it to the shirt and sewed it on. |
It took longer to explain the process than it actually took to make it, lol
 |
| The picture was unfortunately taken at a weird angle and it looks like one side is longer than the other. It is not. |
Finished and it fit perfectly!


No comments:
Post a Comment